22 Oct The Engineering Behind Stable Welding Platforms
In precision fabrication environments, the welding table functions as the primary datum for all downstream accuracy. Every fixture, clamping force, and weld sequence references its surface geometry, making flatness and squareness critical to maintaining dimensional conformity across complex assemblies. However, the table itself is subjected to continuous distortion forces – localized heat input, cyclic expansion and contraction, and dynamic mechanical loading from large or asymmetric parts. The challenge lies in designing a structure that maintains geometric stability while enduring these competing stresses.
1. Material Selection and Thermal Behavior
The foundational determinant of flatness retention in welding tables is the thermal response of the base material – specifically, its coefficient of thermal expansion (CTE) and ability to dissipate heat uniformly. When exposed to localized weld heat or prolonged process temperatures, differential expansion across the surface can induce bowing, twisting, or long-term creep deformation. Selecting materials with low and predictable CTE values directly mitigates these effects, maintaining geometric stability under cyclic thermal loading.
Carbon steel remains a common choice due to its mechanical strength and cost efficiency. Yet its higher CTE makes it more susceptible to distortion in high-duty or continuous thermal applications. In contrast, normalized cast iron and stress-relieved tool steels offer superior dimensional stability due to their microstructural uniformity and reduced residual stress. Their graphite or tempered martensitic matrices enable more uniform heat distribution and minimal localized expansion, thereby preserving flatness even under variable temperature gradients.
Advanced table designs may employ hybrid constructions, such as low-carbon alloy cores with tool steel or cast iron surface plates, to achieve an optimal balance between stiffness, machinability, and cost. In such assemblies, the interface bonding and differential CTE matching become critical, ensuring the materials expand in concert without inducing interface stress. By engineering material properties to optimize thermal behavior, manufacturers create welding platforms that can maintain metrology-grade flatness through repeated heating, cooling, and mechanical loading cycles.
2. Internal Ribbing and Stress Relief
Flatness is not confined to the surface plane; it is the outcome of an engineered internal structure that resists deformation under both static and dynamic loads. Within a precision welding table, internal ribbing and gusset networks form a load-distribution lattice that stabilizes the top plate against bending, torsion, and localized deflection. The rib geometry, often arranged in a crosshatch or cellular configuration, is designed to balance stiffness with thermal responsiveness, ensuring that expansion or contraction forces are absorbed evenly throughout the structure. Proper rib depth, spacing, and orientation are calculated based on the table’s intended load capacity, thermal exposure, and vibration environment.
Following fabrication, the table must undergo a stress-relief process to stabilize its microstructure. Residual stresses from casting, machining, or welding can remain locked within the material lattice, predisposing it to delayed warpage or gradual creep. Controlled thermal stress relief, typically involving uniform heating to the material’s stress-relief temperature followed by regulated cooling, realigns the crystalline lattice and equalizes internal strain energy. This treatment prevents post-process dimensional drift, maintaining surface flatness and squareness even in long-term service. In high-precision applications, additional post-machining stress relief cycles may be applied to ensure that no internal energy remains that could alter geometry. The combination of internal rib reinforcement and thorough stress-relief conditioning transforms the table from a static platform into a structurally tuned precision foundation capable of sustaining metrological accuracy over decades of use.
3. Positional Indexing and Surface Precision
Precision welding tables frequently incorporate T-slots, dowel bores, and grid-patterned holes to support fixture repeatability, modularity, and rapid reconfiguration. Beyond their functional role in workholding, these features contribute to flatness retention by controlling how mechanical loads are transmitted across the top surface. Strategically positioned dowel bores and pin locations constrain lateral and rotational movement, minimizing localized bending and distributing clamping forces uniformly across the table.
Tightly toleranced dowel pins are critical in modular setups where fixtures are repeatedly removed and reinstalled. Each pin ensures positional repeatability within microns, preventing cumulative misalignment that could distort the top surface or propagate error through the assembly stack-up. In aerospace fabrication, where parts are often large, complex, and frequently reconfigured, precision load management is essential. By coupling surface features with structural engineering principles, tables maintain both geometric integrity and metrology-grade repeatability, enabling reliable high-precision fabrication across successive production cycles.
4. Surface Grinding and Calibration
The top surface of a precision welding table is typically precision-ground to achieve parallelism and squareness within a few microns. Surface flatness alone, however, does not guarantee dimensional integrity under operational loads. True performance is realized when the top plate is calibrated relative to the underlying ribbed and gusseted structure, ensuring that load distribution, thermal expansion, and mechanical deflection are accounted for across the full surface.
In high-throughput production environments subject to repeated heat cycles and heavy clamping forces, periodic metrology verification is essential. Laser trackers, interferometry, or coordinate measuring machines (CMM) provide micron-level feedback on surface deviation and angular alignment. Even small departures, on the order of 0.002 inches, can accumulate across fixtures or subassemblies, resulting in misaligned components, uneven thermal contact, or compromised weld geometry. Regular calibration ensures that the table maintains its role as a true geometric reference, enabling repeatable assembly accuracy and reliable system performance over extended service cycles.
5. Environmental and Setup Considerations
Even a precision-engineered welding table can experience surface distortion if environmental and operational factors are not properly managed.
- Uneven floor support introduces localized bending moments, making accurate shimming and leveling to specification essential.
- Continuous welding in a single area generates concentrated heat, causing differential expansion that can warp the top plate.
- Inadequate ventilation exacerbates this effect by trapping heat beneath the surface, preventing uniform cooling, and amplifying thermal gradients.
- For high-precision fabrication, controlling thermal input and distribution is critical. Rotating part locations between welds distributes heat more evenly across the table, minimizing localized distortion. Preheating fixtures before welding helps stabilize the temperature of the immediate contact surfaces, reducing sudden thermal expansion and contraction cycles. By integrating these practices into setup protocols, engineers can preserve micron-level flatness and maintain the table as a reliable geometric reference throughout complex or repetitive fabrication processes.
6. Designing for Scalability and Longevity
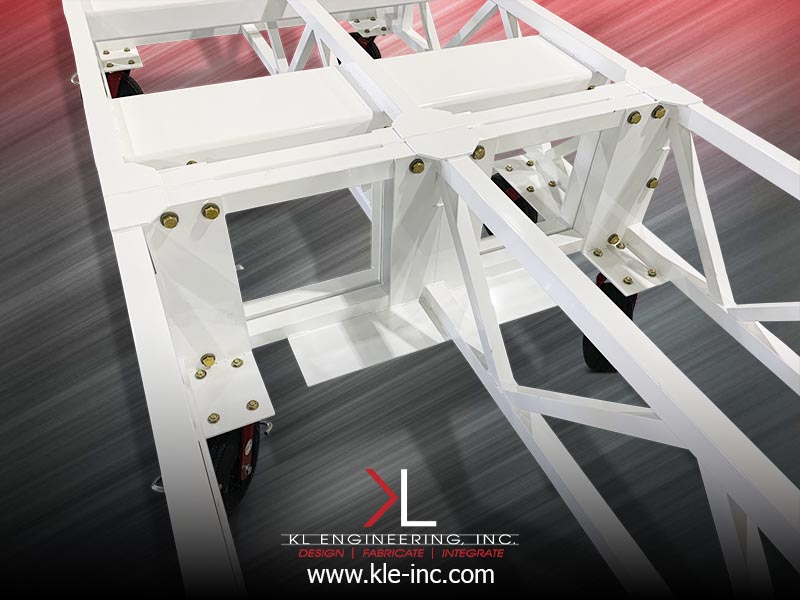
Scalable welding tables utilize modular sections with indexed joints, enabling the working envelope to expand without compromising flatness or alignment. Properly engineered, these modular systems maintain continuous geometric integrity across multiple panels, ensuring that cumulative stack-up errors do not propagate as projects increase in size or complexity. Precision alignment features (such as dowel pins, grid holes, and interlocking joints) control relative motion between sections, preserving micrometer-level accuracy under load and thermal cycling.
Flatness in a high-performance welding table is achieved through integrated structural engineering, rather than relying solely on mass or thickness. Material selection, rib geometry, stress-relief treatments, and precision-ground surfaces collectively create a foundation capable of resisting thermal distortion and mechanical deformation. Surface calibration relative to the supporting structure ensures that the table maintains its role as a true reference plane across repeated use. In this context, flatness is not a static characteristic but the engineered outcome of controlled material behavior, structural reinforcement, and meticulous metrology – delivering long-term stability and repeatable precision in demanding fabrication environments.
Let’s Build the Right Solution – Together.
At KL Engineering, precision and adaptability converge to advance your objectives. Every project is custom-engineered to align with your processes, priorities, and vision – because one-size-fits-all solutions are never enough. Partner with a team that molds to your needs and delivers results engineered for you. Explore how we can elevate your next project: www.kle-inc.com.

